Interface
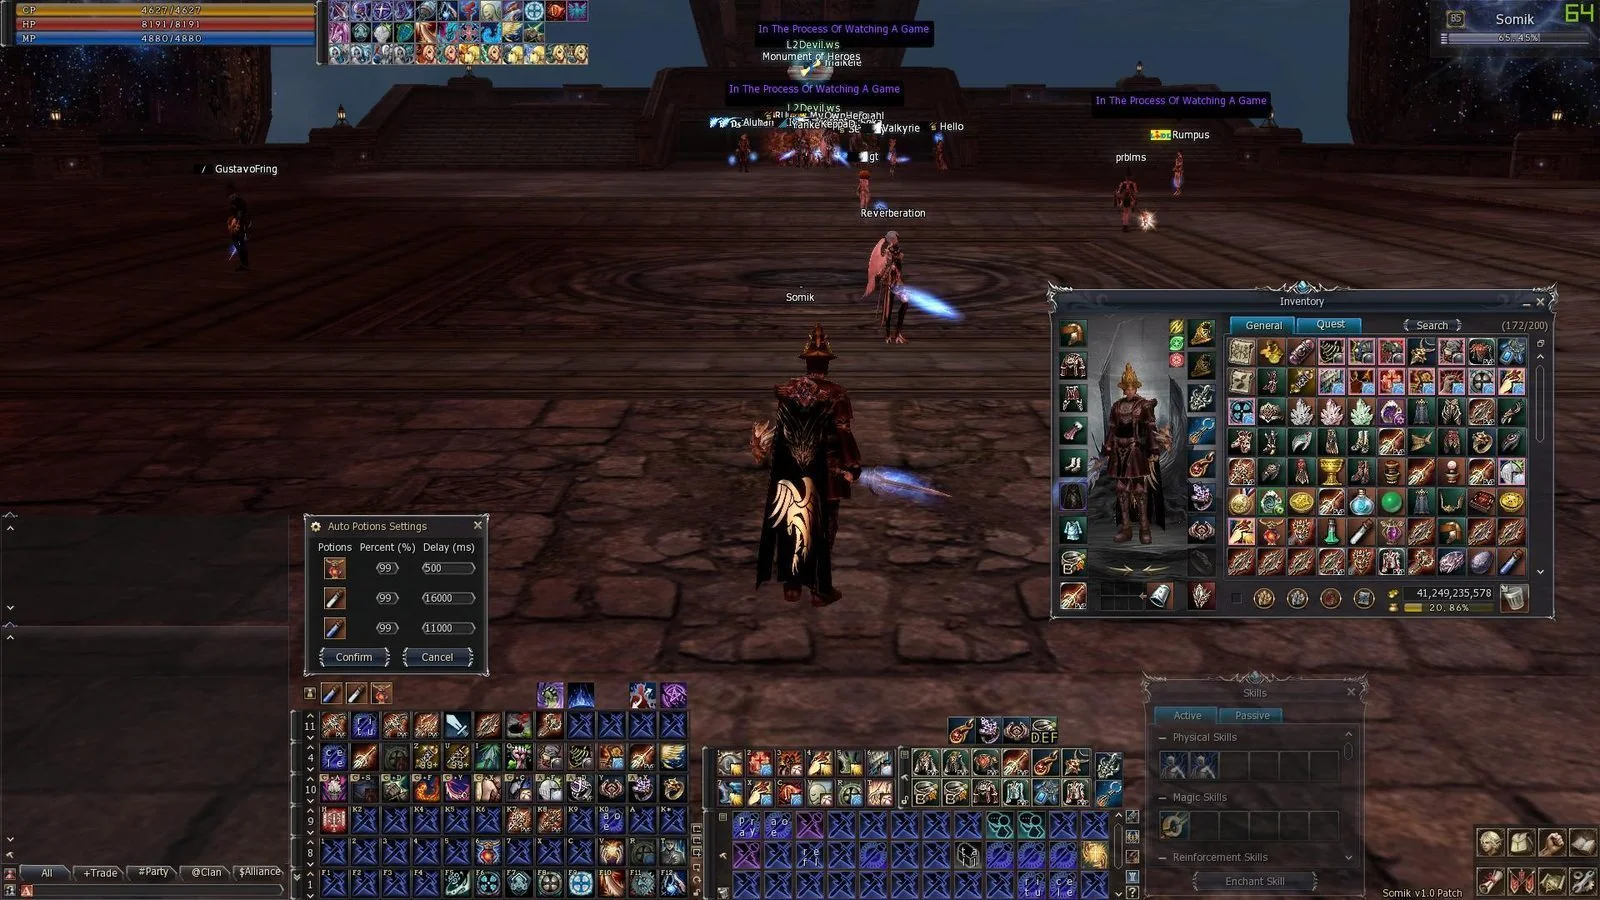
L2 After Work's own High Five client UI, built in-house and multi-language: handy inventory and macros, auto-enchant, server-side auto potions — ACP for HP, MP and CP with auto soulshots, souls and forces, no macros needed — advanced Olympiad windows, on-screen damage and cooldowns, and a loot pop-up you can move out of the way.
On this page
- About the Interface
- Item Drop Window
- Drop Animation
- Target Circle
- Item Tooltip
- Target, Party, Pet Death Effect
- Target Status Window
- Soul Crystal Absorb Info
- Context Menu
- Cache Clear
- Olympiad
- Party
- Magic Skill Window
- Inventory
- Inventory Macros
- Macros
- Items On Screen
- Automatic Use (ACP) — Auto HP, MP and CP Potions, Auto Soulshots, Souls and Forces
- Damage On Screen
- Cooldowns On Screen
- Name Window
- Status Window Smaller
- Buffs And Debuffs Info
- Skill Casting Info
- Chat
- Auto Enchant
- Radarmap Disable Option
- Custom Summon Buffs
- Warehouse
- Options Interface Tab
- Shortcuts
- Next Target Long — Pull From The Edge
- Item Buy Limit
- Skins
# About the Interface
The interface is our own. It is built in-house for L2 After Work on a clean High Five base, and we hold the sources — so this is not a third-party patch we merely install and then wait on: a bug report turns into a fix on our own schedule. We kept everything that genuinely makes the game more comfortable, moved the heavy automation to the server where the anticheat cannot mistake it for a bot, and translated every window, button and tooltip into both languages.
# Item Drop Window
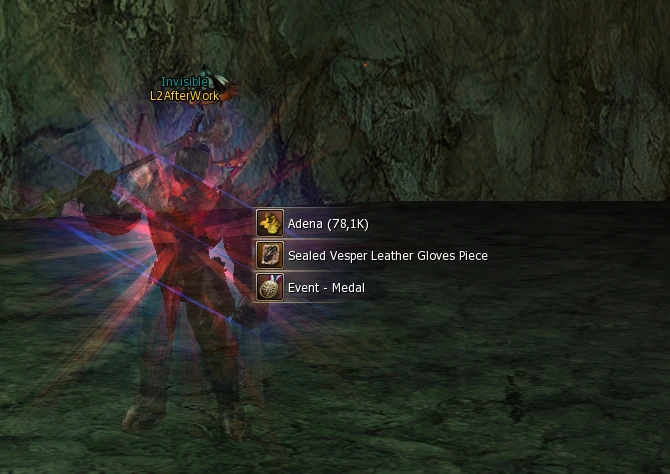
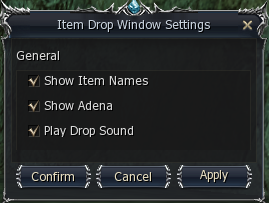
See what you just picked up without opening your inventory. Drops, quest rewards and adena pop up on screen as a small panel with item icons, names and counts: a burst of pickups is gathered into one panel, quest items come first in their own colour, everything else is sorted with the biggest quantity on top, adena reads short — Adena (297K) — and a big haul ends in a line like «+3 more» instead of a wall of rows. A couple of seconds later the panel slides away into the bottom-right corner. Switch it on or off with the «Item Drop Window» checkbox in Options — Interface — Quality of Life; it takes effect the moment you press «Apply», no client restart. The «Settings» button next to it opens «Item Drop Window Settings»: «Show Item Names», «Show Adena» and «Play Drop Sound» under «General», and the «Spawn point» slider under «Position» — at 100% the pop-up appears where it always did, near the centre of the screen, and each step down to 20% brings it closer to the bottom-right corner, out of the middle of your fight. Press «Test» to see a sample pop-up at once and find your spot without going out to farm.
# Drop Animation
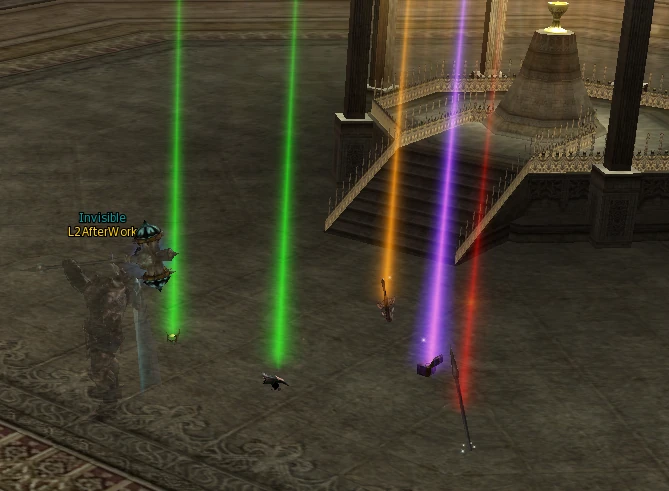
Shows animations for items lying on the ground.
# Target Circle
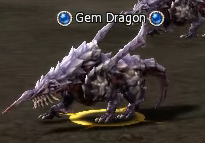
Shows a yellow circle around your current target.
# Item Tooltip
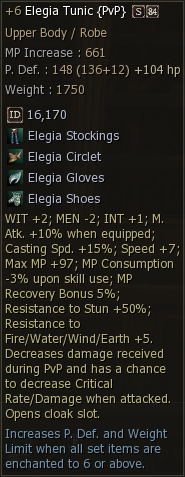
Added ID Texture. Added Stat increase amount from enchants. Added HP increase amount from enchants. Added Images to Armor Set parts.
# Target, Party, Pet Death Effect
Custom death effect for your target, party members and pets.
# Target Status Window
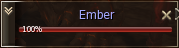
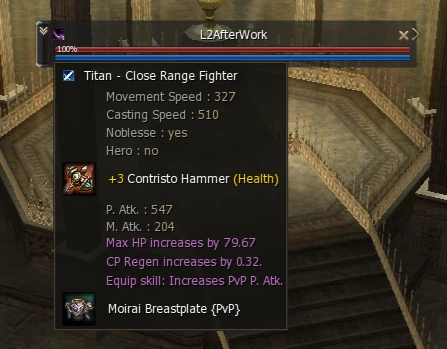
- Target Health Percent
- Option to show target's HP %.
- Target Detailed Class Icon
- Option to show detailed class icons.
- Target Information
- Shows target's information when hovering over the class icon.
- Target Gear Score
- Gear Score of the targeted player in the expanded Target Status Window and in the class-icon tooltip — see the Gear Score page.
# Soul Crystal Absorb Info
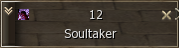
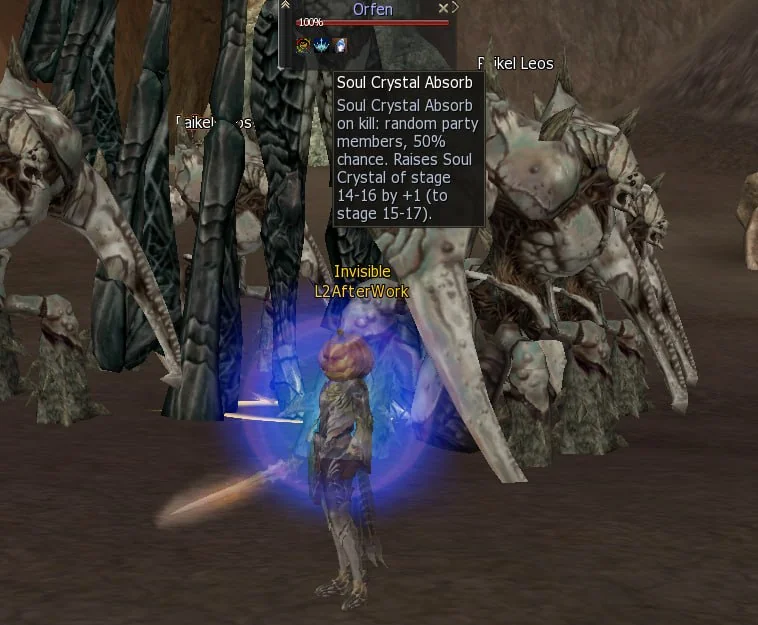
Target a raid or grand boss that takes part in the Soul Crystal absorb quest «Enhance Your Weapon» and its Target Status Window shows a passive skill icon — a red, blue or green Soul Crystal, exactly like the «Raid Boss» badge. Hover the icon to read which Soul Crystal stages this NPC can raise (final stages after the upgrade) and the success chance. The icon colour encodes how the upgrade is distributed in the party: red — one party member who carries a matching crystal, blue — a random party member, green — every party member. So before a kill you know at a glance whether it is worth bringing your crystal there. About 140 NPCs carry this badge — essentially every raid and grand boss the «Enhance Your Weapon» quest registers, plus a couple of special monsters. The crystal must be in your inventory the moment the boss dies; one kill raises the stage by +1.
# Context Menu
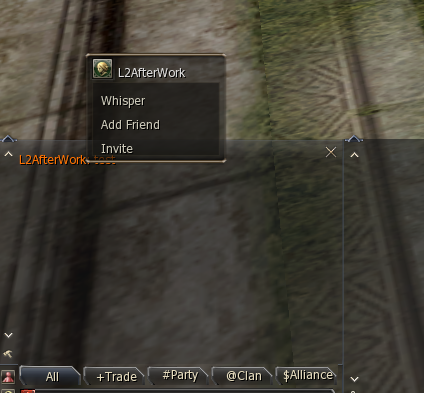
Quick Actions menu when right-clicking the Target Window, Status Window, Party Window and Pet Window.
- Chat Context Menu
- Context menu when right-clicking a name in chat.
# Cache Clear
Automatic client cache clearing — no need to delete System/Cache folders manually.
# Olympiad
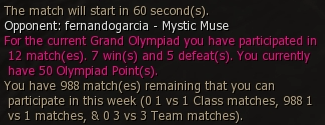
- Class And Olympiadstat At Start Of Olympiad Match
- Shows the class and current Olympiad statistics of your opponent at match start.
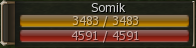
- Olympiad Target Window
- Clickable target window in Olympiad.

- Olympiad Damage Counter
- Bottom left — Enemy Movement Speed. Bottom right — Enemy Casting Speed. Green/Red colors and < > = symbols indicate if you have less, more or equal damage as your opponent.
- Olympiad Auto Record
- Automatically starts recording when you join an Olympiad match and stops when it ends.
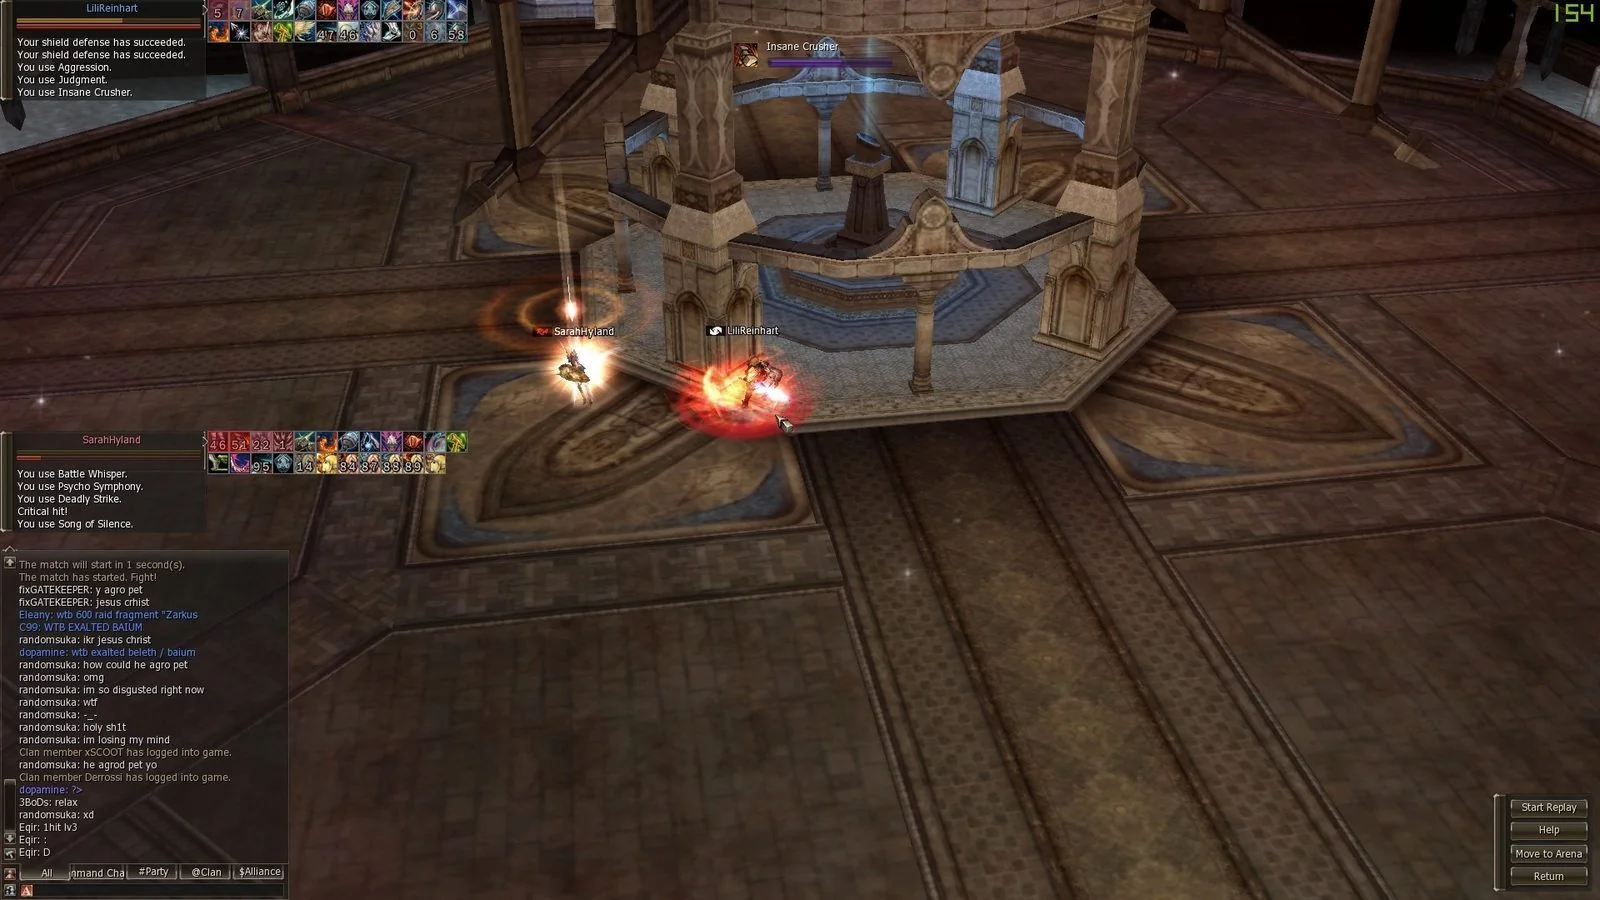
- Olympiad Observe
- Shows chat and buff/debuff timers of the players.

# Party
- Party Buffs
- Display of party members' buffs.
- Custom Party Buffs
- Custom party buff slots.
- Party Noblesse And Level
- Noblesse icon and level shown in the party window.
- Party Gear Score
- Tooltip on a party member's row with their Gear Score, coloured by its band. Works in both the standard and the compact party window.
- Party Invite Gear Score
- The party invitation dialog shows the inviter's Gear Score with its band and, when they already have a party, that party's average Gear Score — so you decide before pressing Yes.




- Party HP Bars Overhead
- A thin HP bar under every party member's name above their head, so you see who is dropping without taking your eyes off the fight. Toggled by the «Party HP Bars Overhead» checkbox in the party window settings.
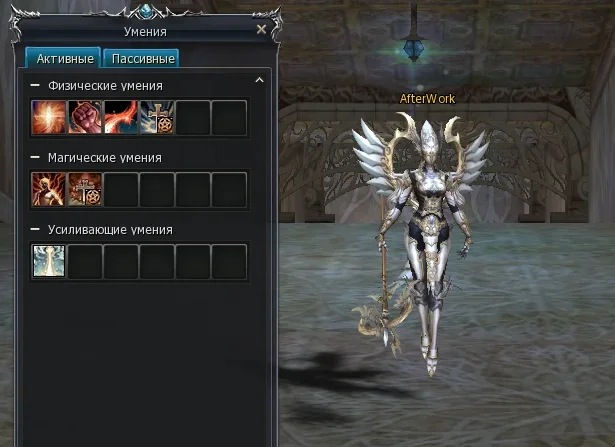
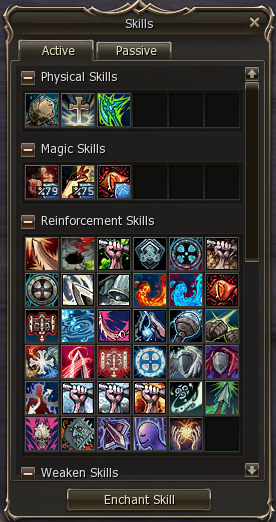
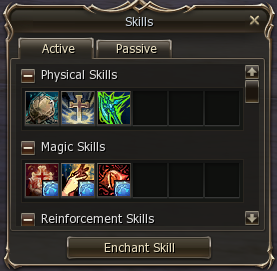
# Magic Skill Window

- Transformation And Item Skills On Top Of Magic Window
- Transformation and item skills are placed on top of the Magic Skill Window.
- Magic Skill Window Smaller Size Option
- Option to use a smaller Magic Skill Window.
# Inventory



- Item Enchant Numbers
- Option to display enchant value of items in inventory.
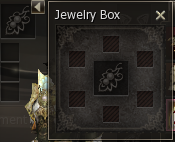
- Jewelry Box Window
- Added inventory support for equipped jewelry and brooches.
- Search
- Quickly search the inventory for desired items.
- Fast Item Delete
- Quickly delete junk items from inventory.
- Extra Buttons
- Utility buttons for Auto Enchants and removing the character model from Inventory for improved FPS.


# Inventory Macros

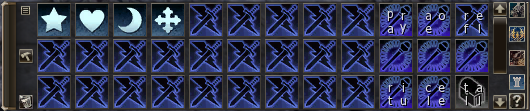


Like normal macros but better. Reworked to support skill usage, chat commands and resizing of the bar. Faster than normal macros and they do not fail when moving, casting skills or doing any other actions.
# Macros



Macro window redesigned to be used as a bar with utility buttons to target summons and open Olympiad Observe.
- Auto Create
- Automatically create macros by dragging and dropping skills, items and actions. Holding CTRL while dropping makes it a /useskillforce macro. Holding SHIFT adds it to the next line. Holding ALT puts /target %self in front.

- Save And Load
- Save your macros and load them on a new server. Settings are saved into System/MacroSettings.ini.
- Swapping
- Swap macro positions in the macro window.
- Loop
- Repeat macros over and over when right-clicked.
- Custom Icons
- 72 extra macro icons.
- Custom Buttons
- Buttons that let you instantly target enemy pets, olympiadstat your opponents and open the Olympiad Observe window anywhere on the map.
# Items On Screen


- Necklace, Rings, Belt, Earrings
- Ability to display accessories on screen.



- Talismans
- Talismans can appear on each of the 2x6 shortcut windows. They show talisman cooldowns, can be unequipped and used directly.
# Automatic Use (ACP) — Auto HP, MP and CP Potions, Auto Soulshots, Souls and Forces

Set your thresholds once and stop watching your bars. Auto potions on this High Five server are a server service, not a client macro: you drop an HP, MP or CP potion into a slot, set the percentage it fires at, and the game server itself reads your real HP, MP and CP twice a second and drinks for you — no client timer, no ping dependency, no macro chain to fall apart the moment the client stutters in mass PvP. Three potion slots dock beside the shortcut bar — auto HP potion, auto MP potion, auto CP potion — auto soulshots and spiritshots keep themselves refilled for as long as you carry them, and a fourth slot keeps Kamael soul bottles filled and force charges topped up from Energy Stones  at 110 Adena
  apiece in the Community Board shop. Every setting lives on the character, so your ACP is still armed after a relog and after the daily restart, and a slot switches itself off the moment its stack runs out instead of staying lit and quietly doing nothing. The same slots answer to the .acp chat command and to the ACP button on the auto farm panel.
- Auto Soulshots And Spiritshots
- Soulshots, Spiritshots, Blessed Spiritshots, Beast Shots, Beast Spiritshots, Blessed Beast Spiritshots and Fishing Shots — armed once, refilled for as long as you carry them.
- Auto HP, MP And CP Potions
- Three slots on the panel. Each one holds a potion, a trigger threshold in percent of your maximum, and a repeat interval. Out of the box the thresholds are HP 70%, MP 60%, CP 90% — every one of them is yours to change in the settings dialog.
- Server-Side Logic
- A personal task on the game server owns the whole loop: it reads your true HP, MP and CP, compares them to your thresholds and uses the item itself. Your client panel only displays what you chose — every setting is written to the character on the server. Nothing to press, nothing to keep alive.
- CP That Keeps Up With A Fight
- The CP slot's floor is 0.5 sec, so it can top you back up twice a second while you are being focused. Every Noblesse has a standing supply for it:
 Summon CP Potion hands out 20 Greater CP Potions
  per cast for 50 Soul Ore
  , on a 10-minute cooldown.
 - Auto Souls And Forces
- A separate slot beside the potion panel. Kamael classes slot a Full Bottle of Souls and choose how many souls they want held in reserve; the server clamps that number to your real Soul Mastery cap, so a bottle is never burned on a full soul pool. Charge classes — Gladiator and Duelist on Sonic skills, Monk, Tyrant and Grand Khavatari on Force skills — slot an Energy Stone and configure nothing at all: below 2 charges, the server spends one. At 110 Adena a stone, staying permanently charged costs pocket change.
- Custom Intervals Per Slot
- Every slot takes its own repeat interval, so you can hold a stack back and stretch it across a five-hour hunt. The one thing you cannot do is go under the potion's real cooldown — a Mana Potion
 stays a 10-second potion whatever number you type, and the panel tells you the minimum instead of silently rounding your input.
 - Auto-Off On Empty Stack
- When the chosen potion runs out of your inventory the slot disables itself and says so in chat, and names the item it is waiting for the next time you arm the slot without it. No more discovering, after a death, that the slot had been dry since the first pull.
- Saved On The Character
- Slot, threshold, interval and on/off state live on the character, not in a client config file — reinstall the client and nothing is lost. Log back in and your slots are still armed.
- Off In Olympiad And Arenas
- Switched off inside the Grand Olympiad, the PvP fight events, Krateis Cube, the Underground Coliseum and Aerial Cleft, and while you carry a siege or fortress combat flag. Arena fights stay decided by the players in them.
- Chat Command .acp
- The HP, MP and CP slots are reachable from a chat menu with the .acp command, and a Kamael's soul slot with them; the force-charge slot lives on the panel. Both routes drive the same server-side state, and there is an ACP button on the auto farm panel too — handy on a second window.
HP potions accepted by the auto-use service
| Potion | Restores | Minimum interval | Where to get it |
|---|---|---|---|
 Lesser Healing Potion Lesser Healing Potion |
120 HP over 15 sec | 10 sec | Grocer in any town — from ~100 Adena |
 Beginner's Potion Beginner's Potion |
120 HP over 15 sec | 10 sec | Event and promotional reward |
 Greater Healing Potion — town grade (id 1061) Greater Healing Potion — town grade (id 1061) |
360 HP over 15 sec | 10 sec | Grocer in any town — from ~360 Adena |
 Greater Healing Potion — shop grade (id 1539) Greater Healing Potion — shop grade (id 1539) |
750 HP over 15 sec | 10 sec | Community Board shop — 5,000 Adena · PC Bang shop — 100 points for 10 pcs · Priests of Dawn and Dusk Priestesses — 1,080 Ancient Adena  |
 Greater Healing Potion — chest drop (id 22025) Greater Healing Potion — chest drop (id 22025) |
750 HP over 15 sec | 10 sec | Drops from Treasure Chests, 1–5 pcs · Prime Shop |
 Greater Healing Potion — event grade (id 14700) Greater Healing Potion — event grade (id 14700) |
1 500 HP over 15 sec | 10 sec | Seasonal Squash event reward |
 Highest Power Healing Potion Highest Power Healing Potion |
1 500 HP over 15 sec | 10 sec | From the Potion Support Pack |
MP potions accepted by the auto-use service
| Potion | Restores | Minimum interval | Where to get it |
|---|---|---|---|
 Mana Drug Mana Drug |
500 MP over 10 sec (50 MP per second) | 10 sec | Event and promotional reward |
| Mana Potion |
+500 MP instantly | 10 sec | Community Board shop — 10,000 Adena · PC Bang shop — 200 points for 10 pcs · included in the Starter Packs sold for Coin of Luck  |
CP potions accepted by the auto-use service
| Potion | Restores | Minimum interval | Where to get it |
|---|---|---|---|
| Greater CP Potion — Noblesse and event grade (id 5592) |
+200 CP instantly | 0.5 sec | Noblesse skill Summon CP Potion — 20 pcs per cast for 50 Soul Ore · Community Board event shop — 10 Silver Shilen  for 20 pcs · Priests of Dawn and Dusk Priestesses — 600 Ancient Adena for 20 pcs · Priests of Dawn and Dusk Priestesses — 600 Ancient Adena |
 CP Potion CP Potion |
+50 CP instantly | 0.5 sec | Priests of Dawn and Dusk Priestesses — 240 Ancient Adena (Seven Signs) |
 Greater CP Potion — Prime Shop (id 20353) Greater CP Potion — Prime Shop (id 20353) |
+200 CP instantly | 1 sec | Prime Shop |
 Potion of Will Potion of Will |
+50 CP instantly | 0.5 sec | Prime Shop |
 2006 Battle Tournament - CP Potion 2006 Battle Tournament - CP Potion |
+200 CP instantly | 1 sec | Tournament event reward |
Souls and Forces accepted by the auto-use service
| Consumable | Restores | Minimum interval | Where to get it |
|---|---|---|---|
 Full Bottle of Souls - 5 Souls Full Bottle of Souls - 5 Souls |
+5 souls, up to your Soul Mastery cap | 1 sec | Community Board shop — 2,050 Adena |
 Full Bottle of Souls - 5 Souls (For Combat) Full Bottle of Souls - 5 Souls (For Combat) |
+5 souls, up to your Soul Mastery cap | 1 sec | Community Board shop — 1,500 Adena · Suspicious Merchants in any fortress |
 Full Bottle of Souls - 10 Souls Full Bottle of Souls - 10 Souls |
+10 souls, up to your Soul Mastery cap | 1 sec | Event and promotional reward |
| Energy Stone |
+1 force charge, cap 2 | 1 sec | Community Board shop — 110 Adena · Grocer in any town, from ~110 Adena |
# Damage On Screen
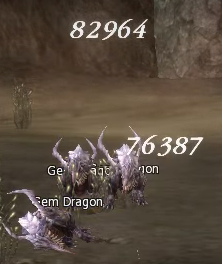
Four switches in Options — Interface — Damage On Screen, and each one takes effect from the very next hit once you press «Apply» — no client restart.
- Normal On Screen Damage
- The damage you deal — and the MP you burn off an opponent — as a number in a fixed spot on the screen.
- Classic On Screen Damage
- The classic floating combat numbers: damage, crits, overhits, recovered HP, MP and CP, XP and more, each one switchable in its own settings dialog.
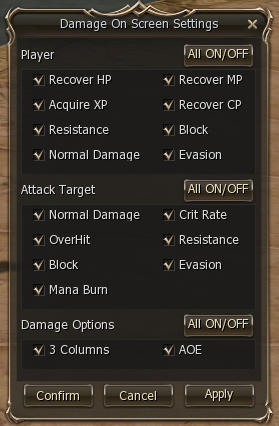
- Damage On Screen Settings
- Opened by the «Settings» button next to «Classic On Screen Damage»: tick, event by event, which numbers appear for you («Player») and for your target («Attack Target»), and under «Damage Options» choose «3 Columns» or «AOE», which sums an area hit into one number.
- On Target Damage
- Shows damage, crits, evades, resists and debuffs on the target.
- Debuff Result on Screen
- When your debuff lands or gets resisted, the skill name flashes in big letters in the middle of the screen — green if it landed, red if it was resisted. Untick it to keep the centre of the screen clear: the chat line stays, so you still see whether the debuff went through, and siege, Olympiad, duel and event messages are not affected. On by default.
# Cooldowns On Screen
- Skill Cooldowns
- Display your most important cooldowns anywhere on the screen.
- Lifestone Timers
- Display exact timers for your lifestone cooldowns like augment nukes.

- Talisman Cooldowns
- Cooldown timers for talismans.
# Name Window
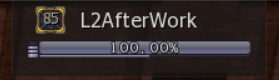
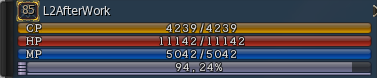
Separate window to display your name, level and EXP. Requires the «Status Window Smaller» option to be enabled.
# Status Window Smaller
Option for making the status window smaller.

# Buffs And Debuffs Info

- Noblesse In Debuffs

- Added Noblesse in debuffs for player, party and pet/summon.
- Received Debuffs

- Shows the debuffs you have received anywhere on the screen. Can be moved and you can enable/disable the time remaining.
- Debuff Timers
- Shows the exact time of your debuffs without the need of custom DLL files.
- Cancel Information
- Shows the buffs that have been canceled. Up to 14 buffs.
- Enemy Buff Timers
- Timers are optimized for PvP and Olympiad separately. For Olympiad the same buffs appear on the same positions to promote muscle memory.

- Target Debuffs
- Target debuff display (server-side support enabled on our server).
- Debuffs Succeed And Fail
- Green — succeed (server has the succeed system message enabled). Red — fail. Shown as the skill name in big letters in the middle of the screen; untick «Debuff Result on Screen» in Options — Interface — Damage On Screen to hide it and keep just the chat line.
- Enemy Trigger Buff Timers
- Shows the important trigger buffs of your Olympiad opponent and their time remaining.



# Skill Casting Info

- Enemy Cast Bar
- Shows the skill your target is casting. Second row shows the activation of cubics, like cleanse. Optional: can be enabled to show the cast of everyone around you.
- Classic Own Cast Bar
- Shows the skill that you are casting.

# Chat
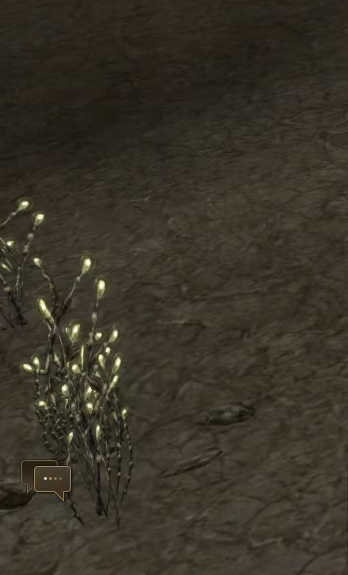
- Chat Close
- Ability to close the chat, which leaves a chat icon.

- System Message Window Movable
- The System Message Window can be moved and locked in place.
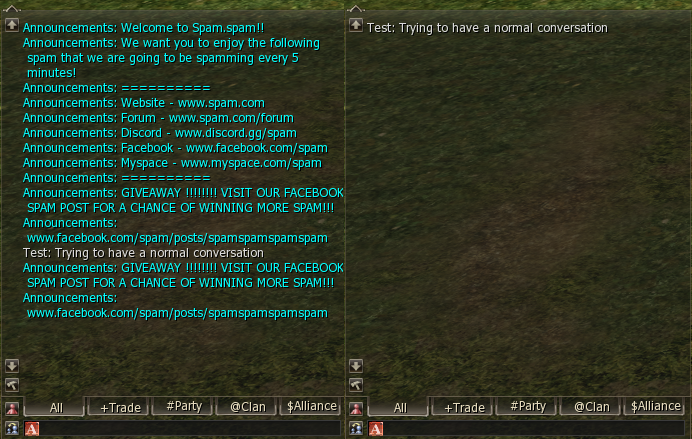
- Chat Announcements Filter
- Can disable all server announcements to reduce the spam.
- Bigger Chat Limit
- Increased number of stored chat messages.
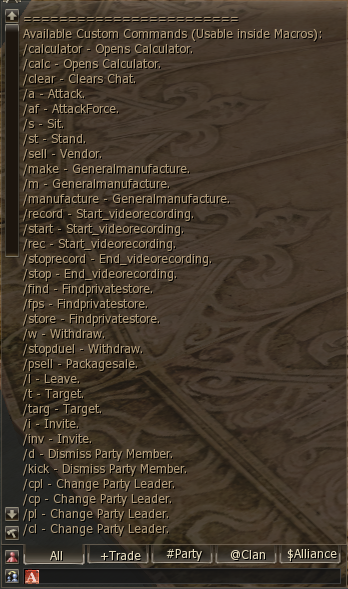
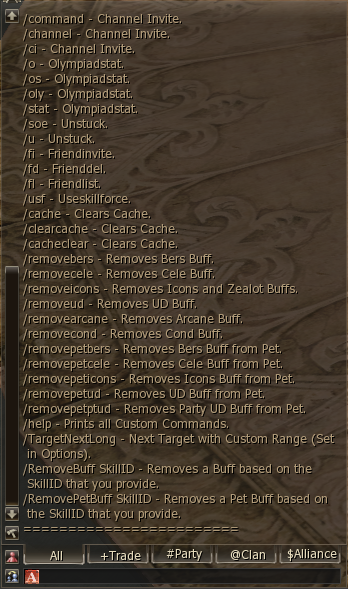
- Custom Chat Commands
- Can be used in chat or from Macros and Inventory Macros. Type /Help to see all available commands.
- Buff Remove Commands
- Can be used in chat or from Macros and Inventory Macros.
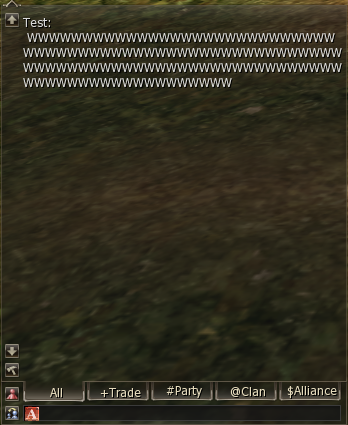
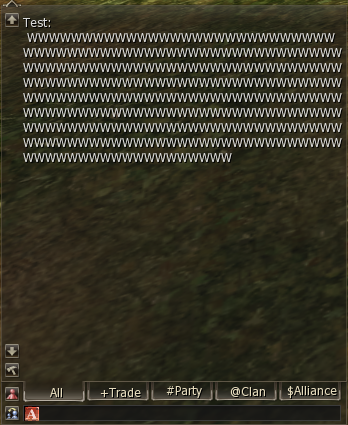
- Chat Bigger Size
- Bigger chat font size option.
# Auto Enchant
- Auto Attribute
- Automated attribute enchanting.

- Auto Augment
- Lists all available augments. Combo — stops for checked Active/Passive/Chance + Stat. Mage/Burner/Fighter — checks all augments that benefit them (burner: refresh, spell refresh, nukes, etc.). Uncheck After — unchecks the augment after you get it.
- Auto Skill Enchant
- Right-clicking a skill puts it into the enchant window.
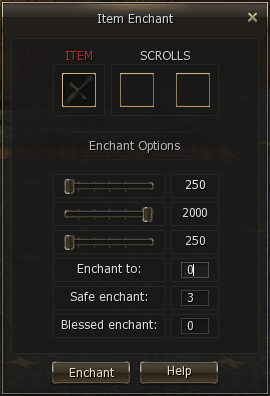
- Auto Item Enchant
- Placeholder Item Enchant Window.
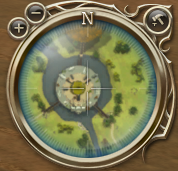
# Radarmap Disable Option
Option to disable the radar map.

# Custom Summon Buffs
Extended display of summon/pet buffs.
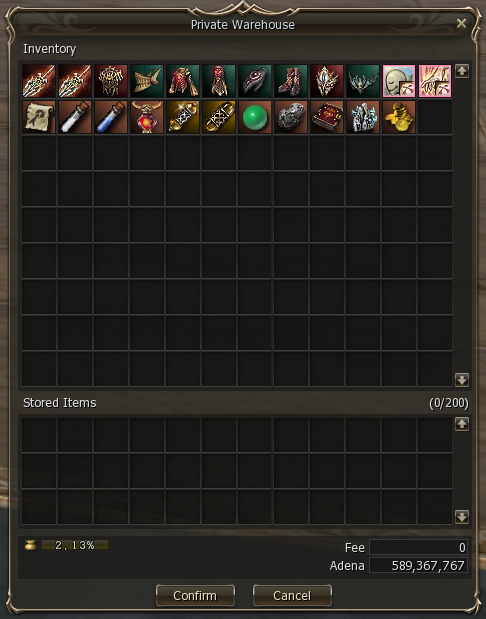
# Warehouse
Improved warehouse window.
# Options Interface Tab
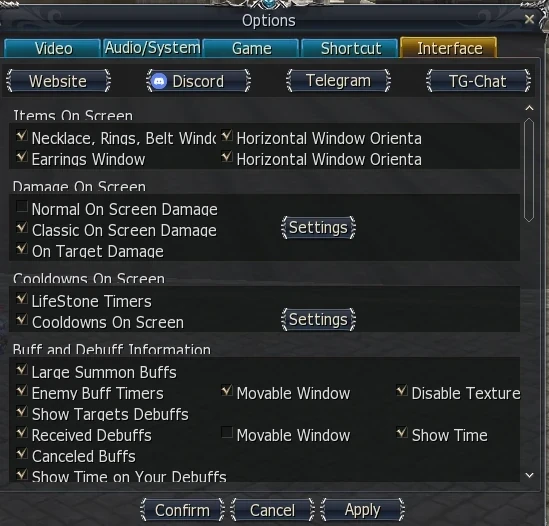
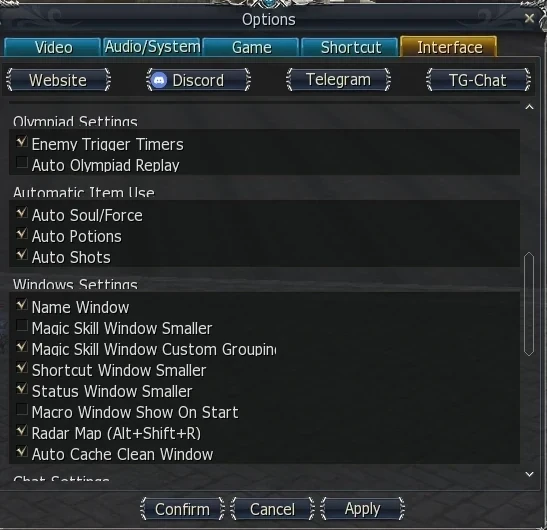
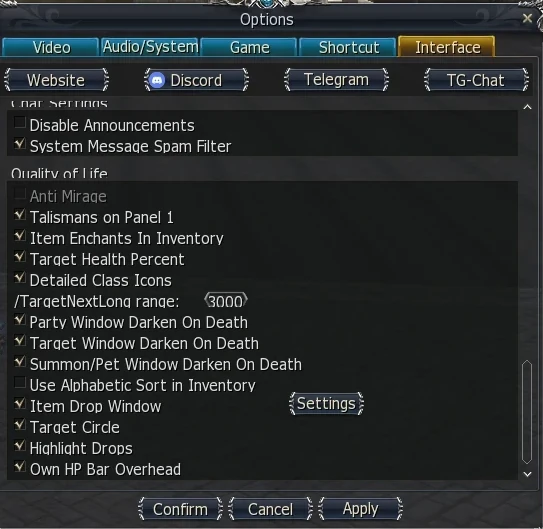
Can open it directly if you hold CTRL while clicking on the System Menu button in the bottom right.
# Shortcuts
- Next Target Long
- Targets the farthest attackable creature within a radius you choose — the pull key for archers, nukers and anyone who wants the mob at the edge, not the one underfoot — or, by a switch in its settings, the nearest one. Bindable here through «Enter Chat». Full description in the Next Target Long section below.
- Options Shortcuts Tab
- Extended shortcuts tab in Options.

- Shortcut Window
- Improved shortcut window.
- Shortcut Window Smaller Size Option
- Smaller shortcut window option.

# Next Target Long — Pull From The Edge
One key, and your target is the farthest monster you can reach. Stock Lineage 2 only offers Next Target, which grabs whatever stands closest — fine for a melee grind, useless the moment you want to open on the mob at the back of the pack, pull a single one out of a camp before the rest notice you, or kite from the full length of your bow. Next Target Long is that missing key. Press it and the interface scans everything attackable around you out to a radius you set yourself, and locks the one at the far edge; press it again with that target still alive and you get the next-farthest, so you can walk a whole camp from the outside in without ever clicking on a tiny model two screens away. It picks only what you could actually hit — monsters, flagged and PK players, your Olympiad opponent — and skips corpses, your own pet and the target you already hold. Prefer the other end of the pack? The same command can be switched to take the nearest creature instead — Next Target with your own radius — so a melee character gets the same key with the pick that suits it. Both settings live in one small dialog: Options — Interface — Quality of Life — /TargetNextLong — Settings, where you type the radius and tick the mode; hovering over either explains exactly what it does. The default radius is 2000 game units, which is also the ceiling: that is as far as the server sends you information about anything at all, so a bigger number would only pretend to look further. Type more and the interface saves 2000 and tells you so in the system chat. Bind it to a key on the Shortcut tab, type /TargetNextLong in chat, or drag the button from the Actions window onto your bar or into a macro — all three routes do the same thing. Together with the regular Next Target, you have both ends of the fight on two keys: the mob in your face and the mob at the edge.
- How It Picks
- The farthest attackable creature inside the radius, measured from your character — or the nearest one, if you switch the mode in its settings. Monsters, flagged and PK players and your Olympiad opponent count; corpses, your own pet and your current target are skipped.
- Second Press
- With the first target still alive, the next press skips it and takes the next-farthest one (or the next-nearest, in the nearest mode), so repeated presses walk the pack from the outside in. Once the target dies, the next press starts again from the farthest.
- Radius And Mode
- Options — «Interface» tab — «Quality of Life» — «/TargetNextLong» — «Settings»: one dialog with the radius box and two ticks, «Farthest first» (the default) and «Nearest first». Radius default 2000 game units, which is also the maximum: the server does not send you creatures beyond that distance, so nothing further could be targeted anyway. A larger value is saved as 2000 and announced in the system chat. Hover the box or either tick for a reminder.
- Three Ways To Fire It
- A key on the Options — «Shortcut» tab; the /TargetNextLong chat command; or the button in the Actions window, which you can drag to the shortcut bar or into a macro.
- Pairs With Next Target
- Stock Next Target still takes the nearest creature. Keep both bound and you can open on the edge of the camp and then clean up what reaches you — or set Next Target Long to «Nearest first» and use it as a Next Target with a radius of your own.
# Item Buy Limit
Item buy limit indicator.
# Skins
Optional SysTexture files that change the appearance of the interface. By default we use the Dark skin with our own L2 After Work tweaks — nothing to download or install separately.
- Dark
- Default skin used on L2 After Work, with our own customizations.